I bought these bad boys at the DI for $7.00 a piece. Matching nightstands are hard to come by, so when I spotted these two, I knew with some paint and DIY vision these things could be awesome.

First things first, I took of the ugly cain and surrounding border off of the drawer front.

Next, I sanded, and primed the subjects.

Then my awesome husband painted them a cherry red color.
This next part is hard and takes patience and a steady hand. Since I wasn't blessed with either, I stood back and took pictures.
 Get a mirror. We bought this one at Home Depot for $6.00. It was the perfect size for what we needed. When all was said and done, we ended up purchasing two mirrors. We broke the first one...
Rip the paper off of the back of the mirror and remove the frame. You also want to scrape the goo off.

Place the mirror on a towel on a flat surface.

Purchase a glass cutting kit at Home Depot. It was $13.00 (worth every penny!)

Mark your mirror with the pen where you want to make a cut. Then take the cutting wheel and follow the line you made. (Follow the directions on the back of the package)

At the other end of the cutting wheel is a ball. With this you hit the back of the mirror where you made the cut.

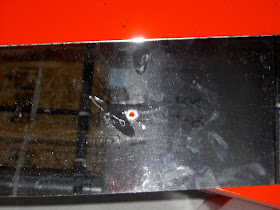
Hopefully you didn't hit too hard, because this is what happens...

This is what you should have. A nice piece of mirror.

Next, you need to mark where you want the knob to go. We chose the middle.
***I was lying about the last part. The next part is actually the hard part...


To complete the project, you need a drill with a glass/tile cutting bit. The key here, is to go a medium consistent speed with the drill. Matt drilled in the front, then turned it over once he could see a hole from the back, then drilled from the back. Back and forth, until the hole was big enough. Make sure to blow the dust away from the hole. Don't rush...

You should have a nice little hole like this...

Next, drill a hole in the drawer front. Make sure it matches up with the mirror.

After that, smear liquid nails on the drawer.

Place the mirror on the front of the drawer, line it up, make sure it is straight and clamp it down. You can put the knob on too if you want. Take it front me, DO NOT SCREW THE KNOB DOWN TIGHT, IT WILL BREAK THE MIRROR. Then your husband will throw his hands in the air and yell that he is done and go upstairs... Just Sayin'.
Now you have your very own mirrored nightstand!

I think I'm in love!


Soooo Cute!!! Arent you lucky that he is so handy!
ReplyDeleteIt's beautiful! I admire both of your handy work. :)
ReplyDeleteFab find, wonderful job & great perseverance through the broken mirror =)
ReplyDelete-caroline @ c.w.frosting
Great details and cautionary hints. It looks great. I never would have thought to combine it with read but yay you because it looks great. Thanks for linking it to Motivated Monday.
ReplyDeletePam
You are really hard worker. Good job.
ReplyDeleteI also like your mirror design.
Rubi Tile Cutter